Din indkøbskurv
Der er ikke flere varer i din indkøbskurv


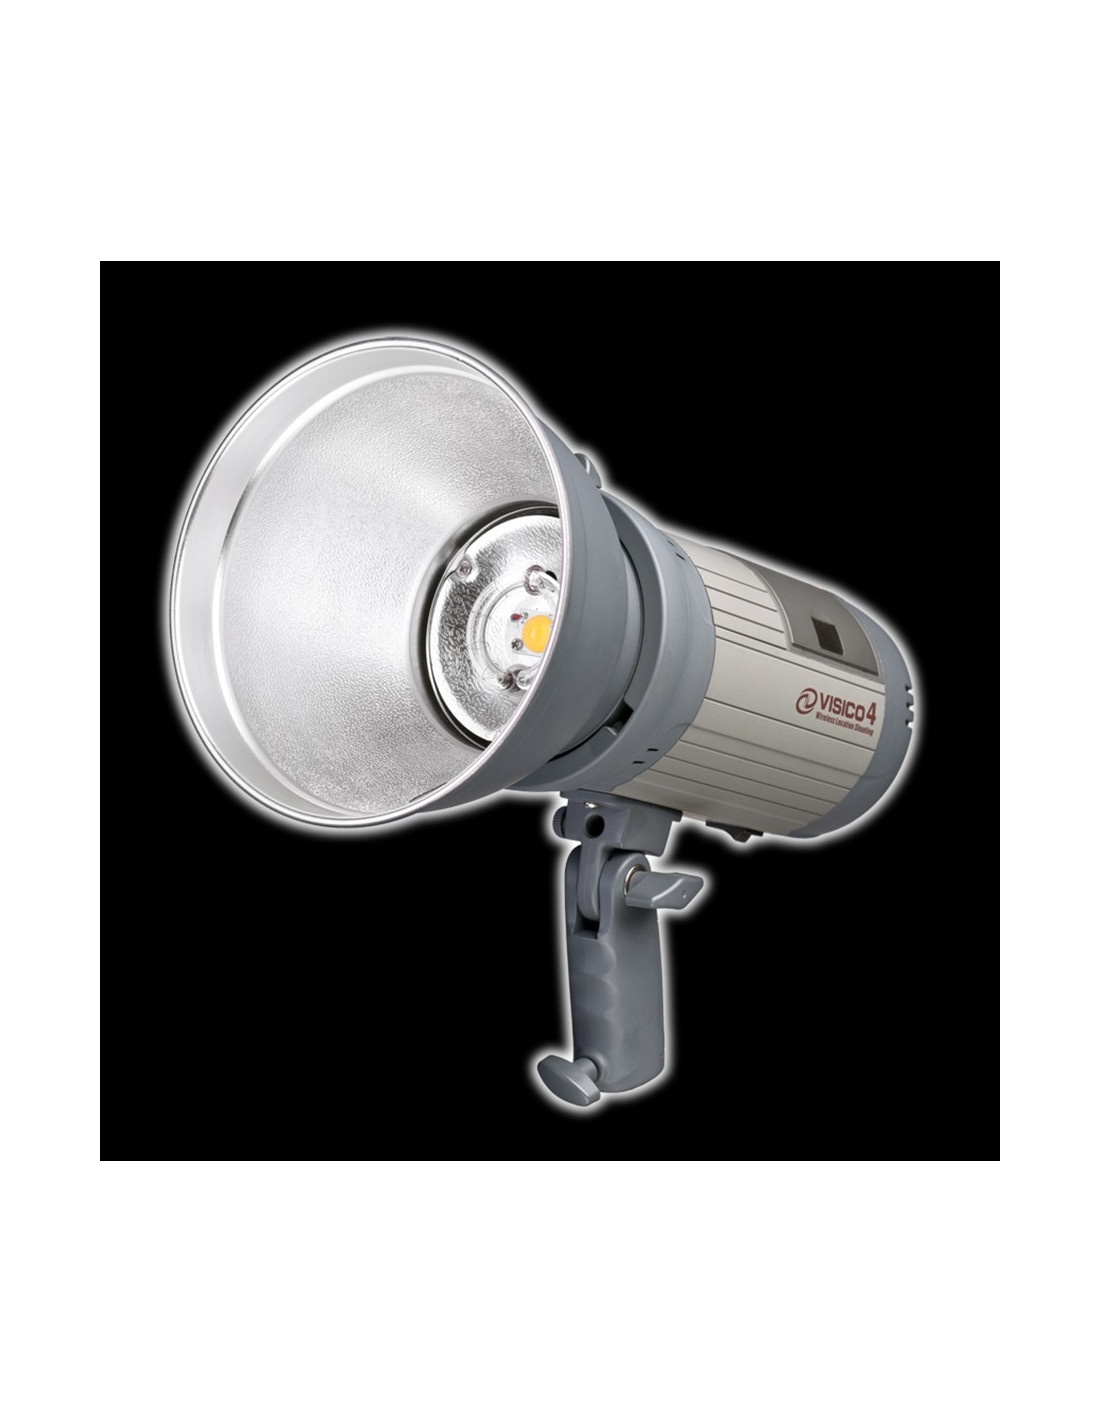
User Guide
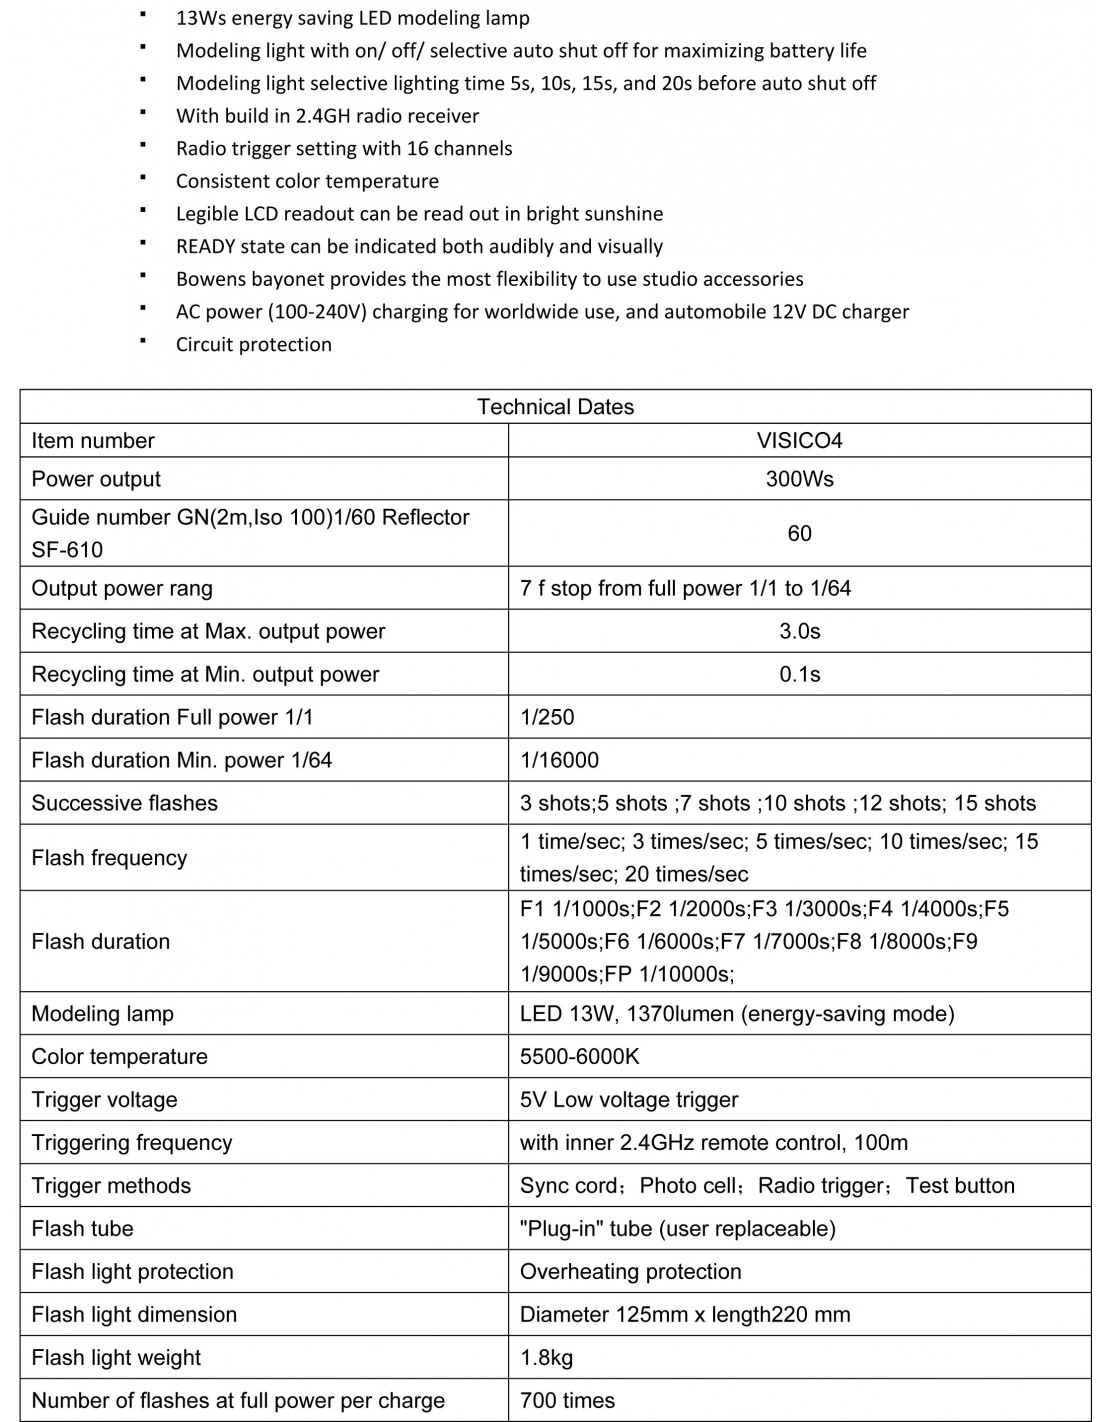
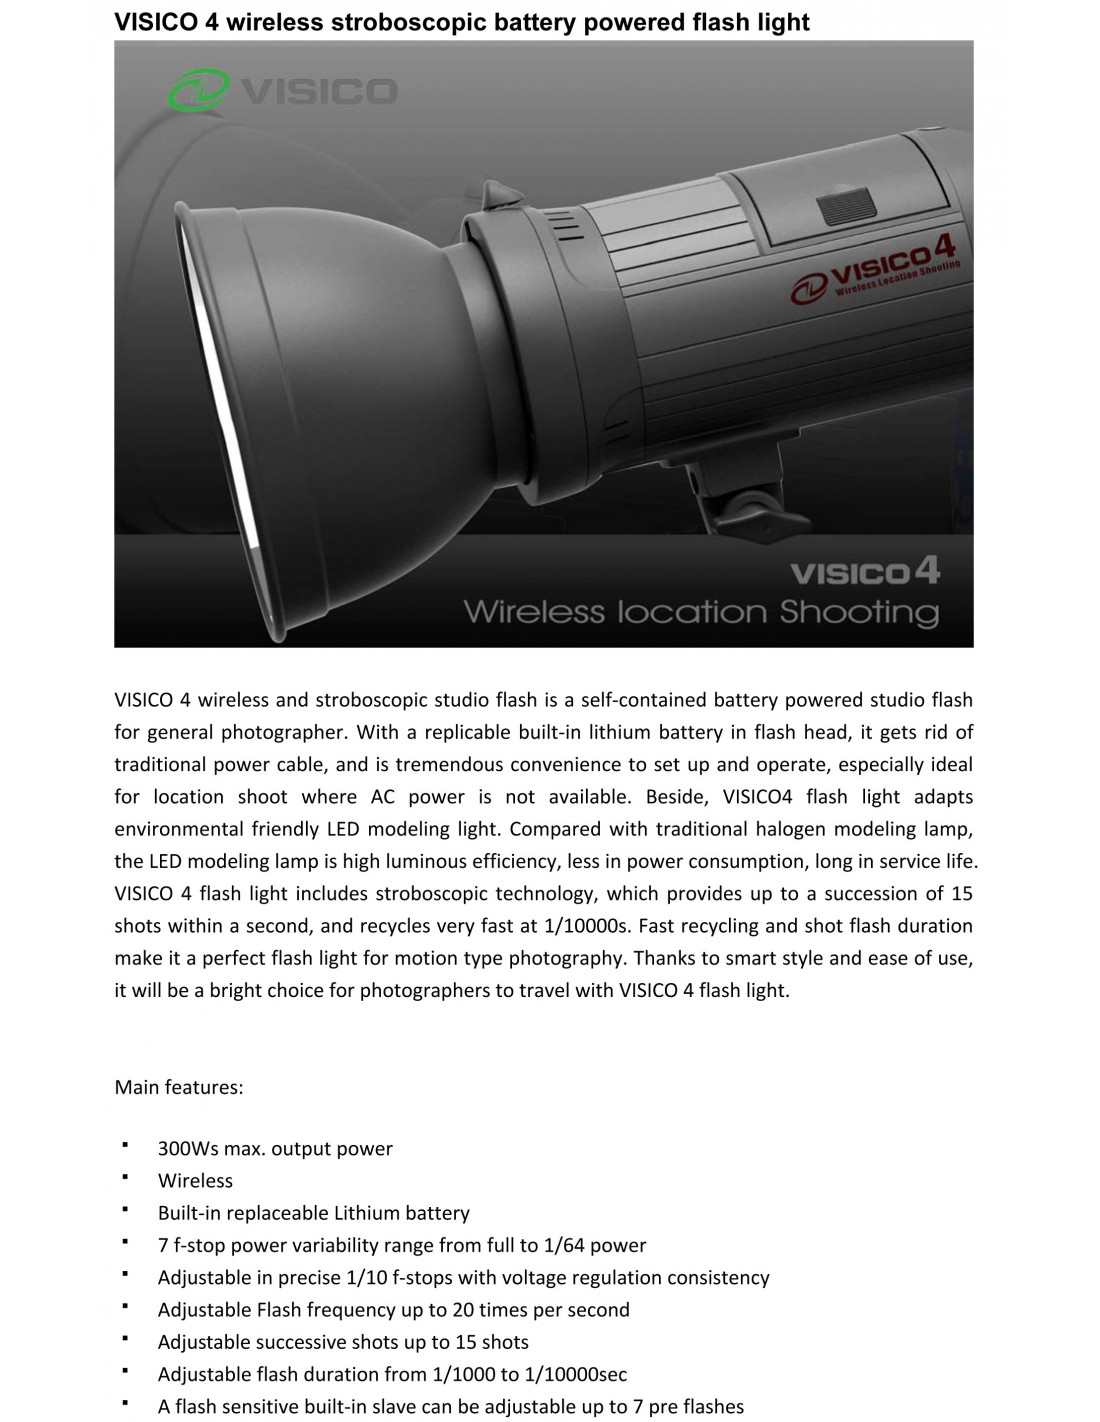
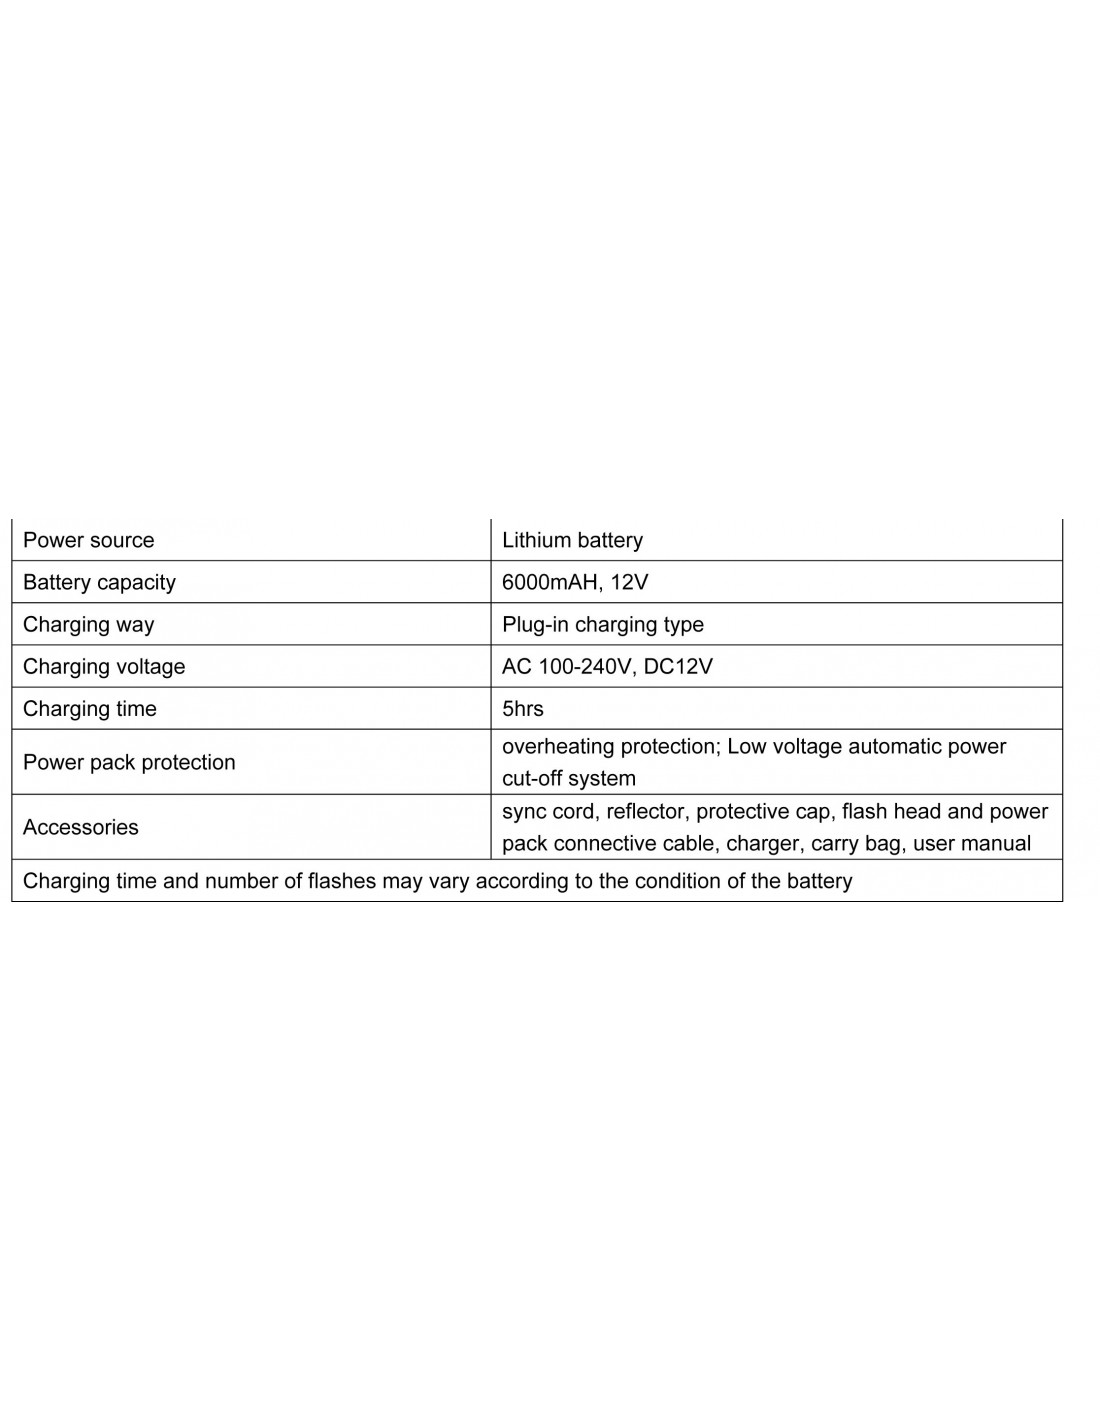
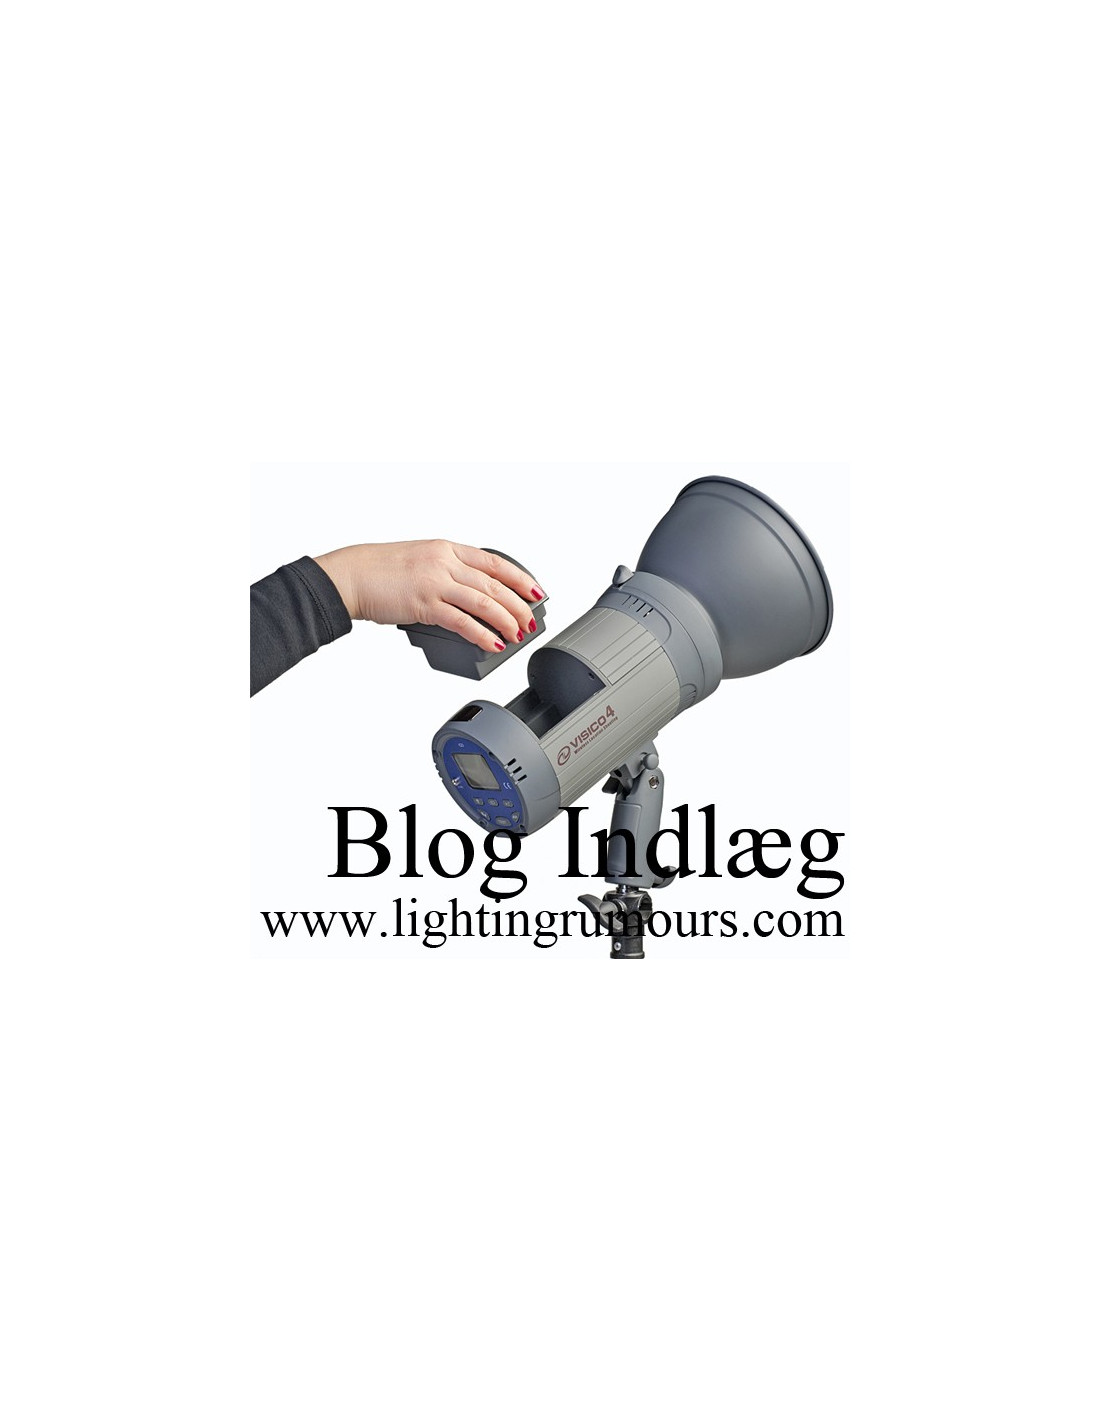
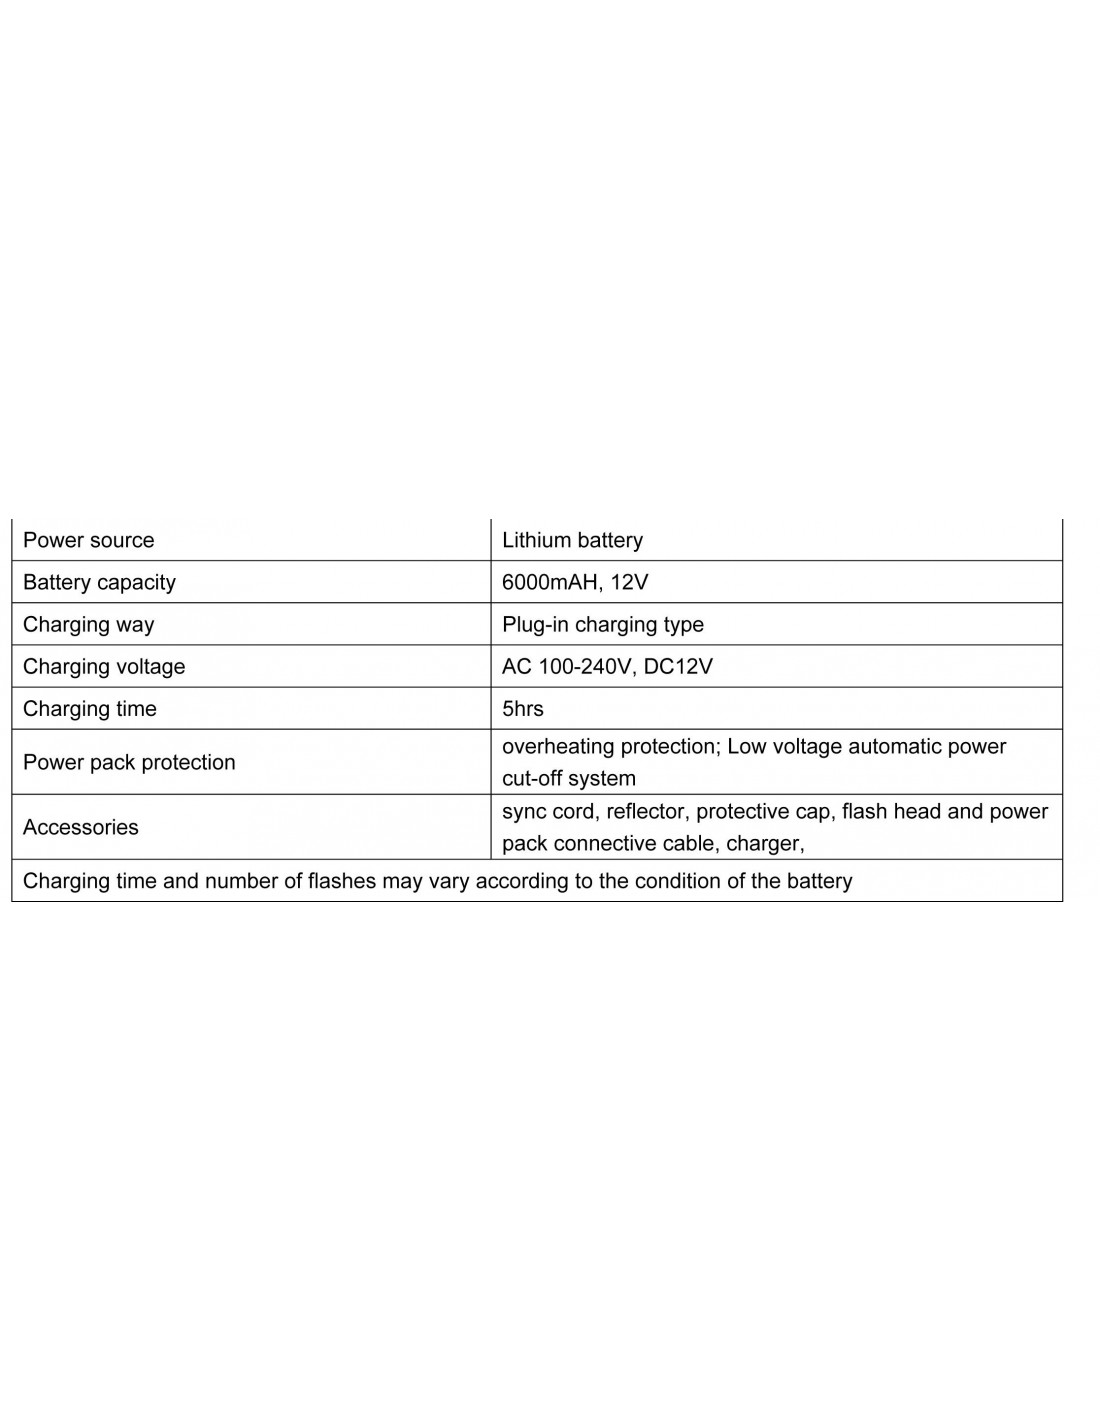
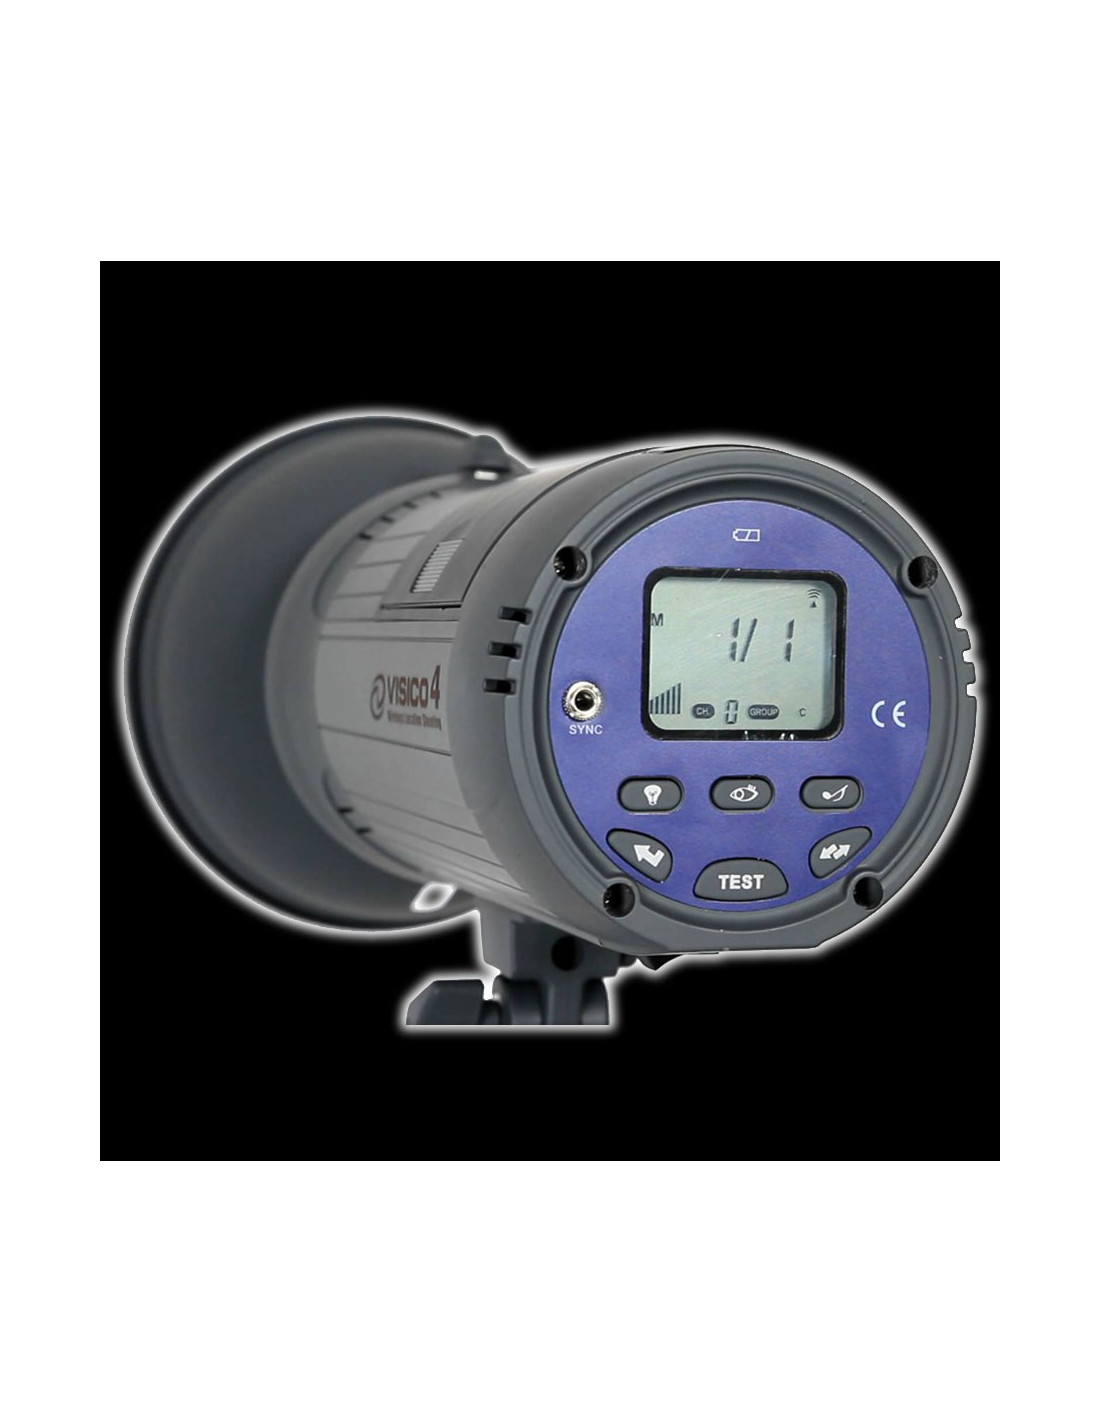
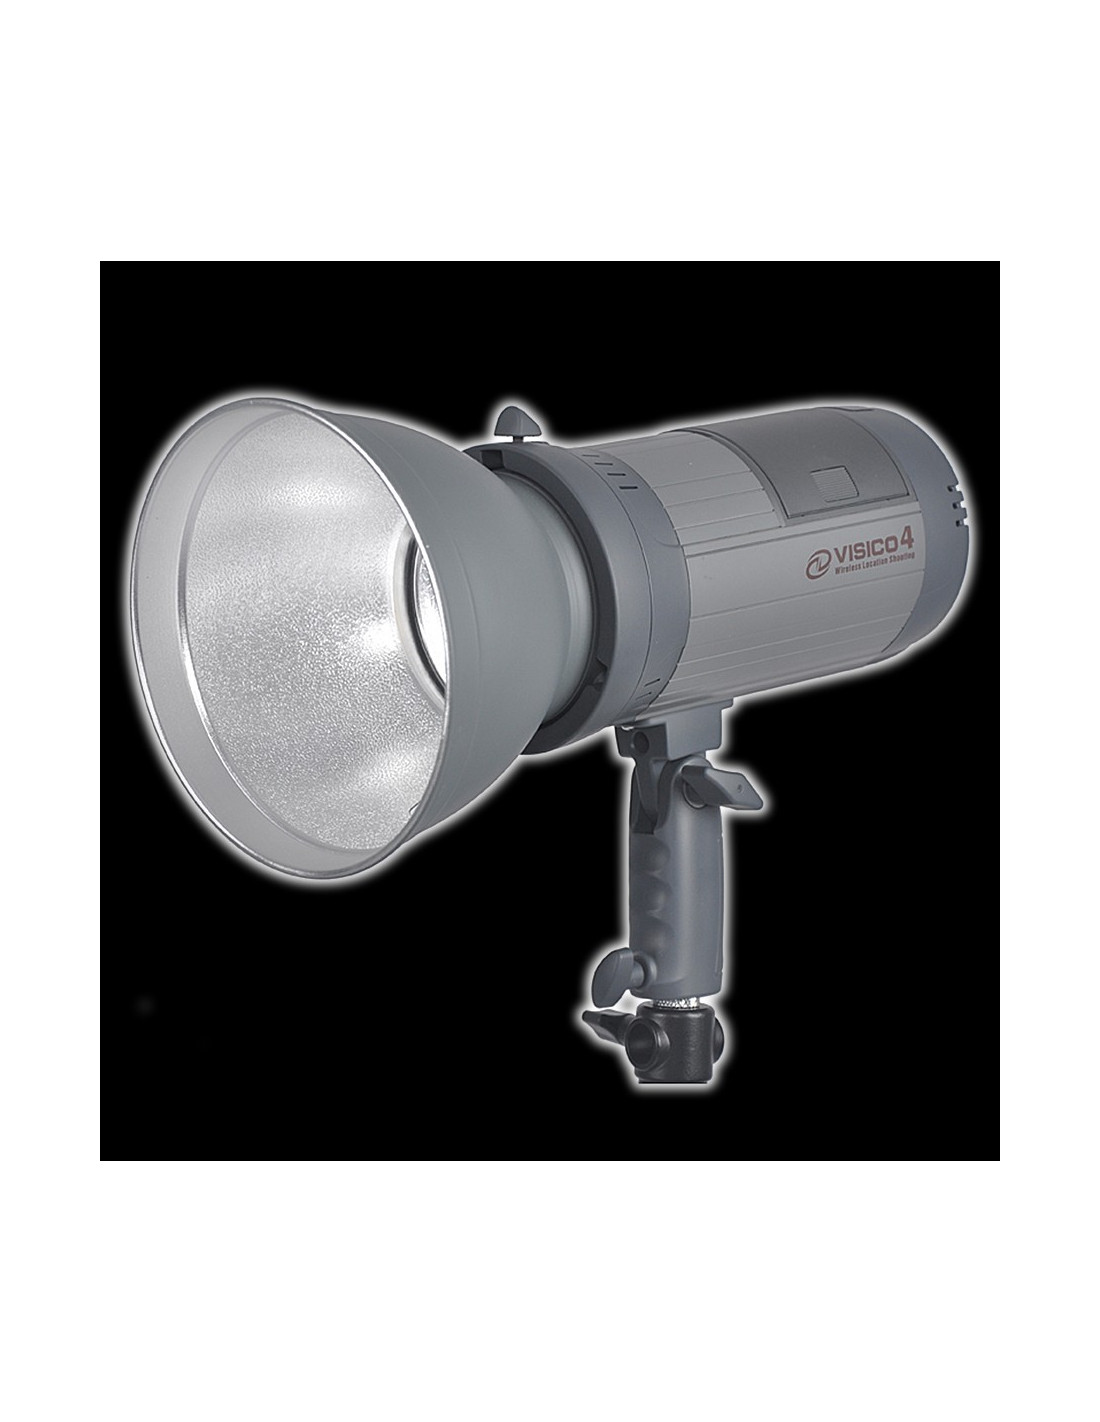
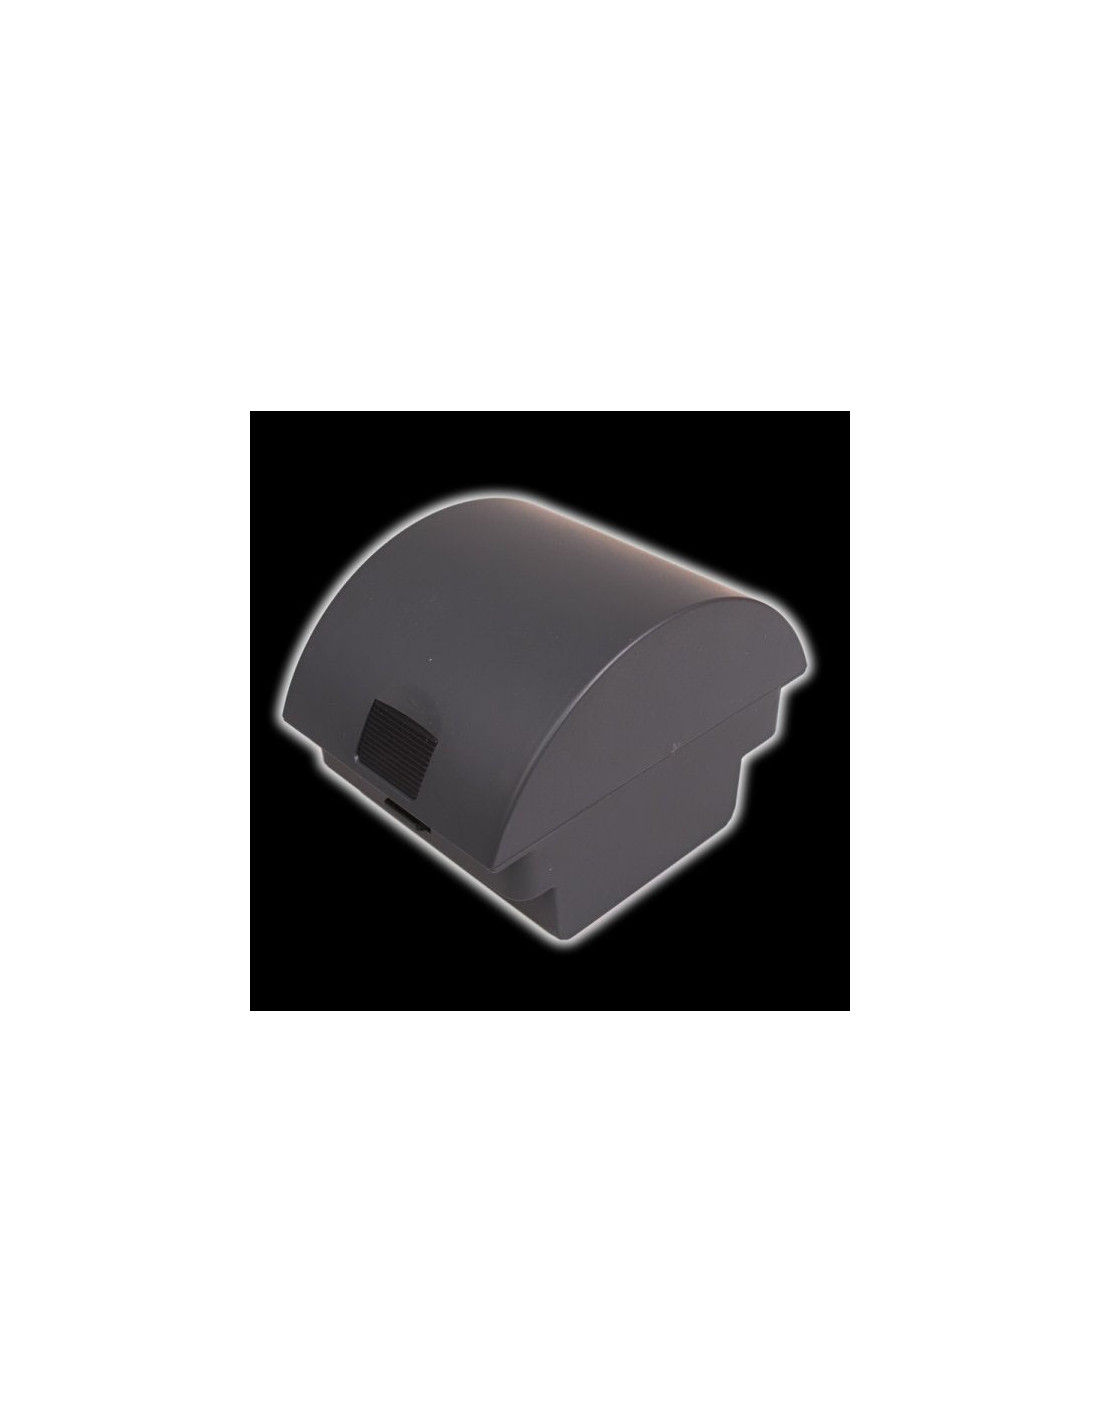
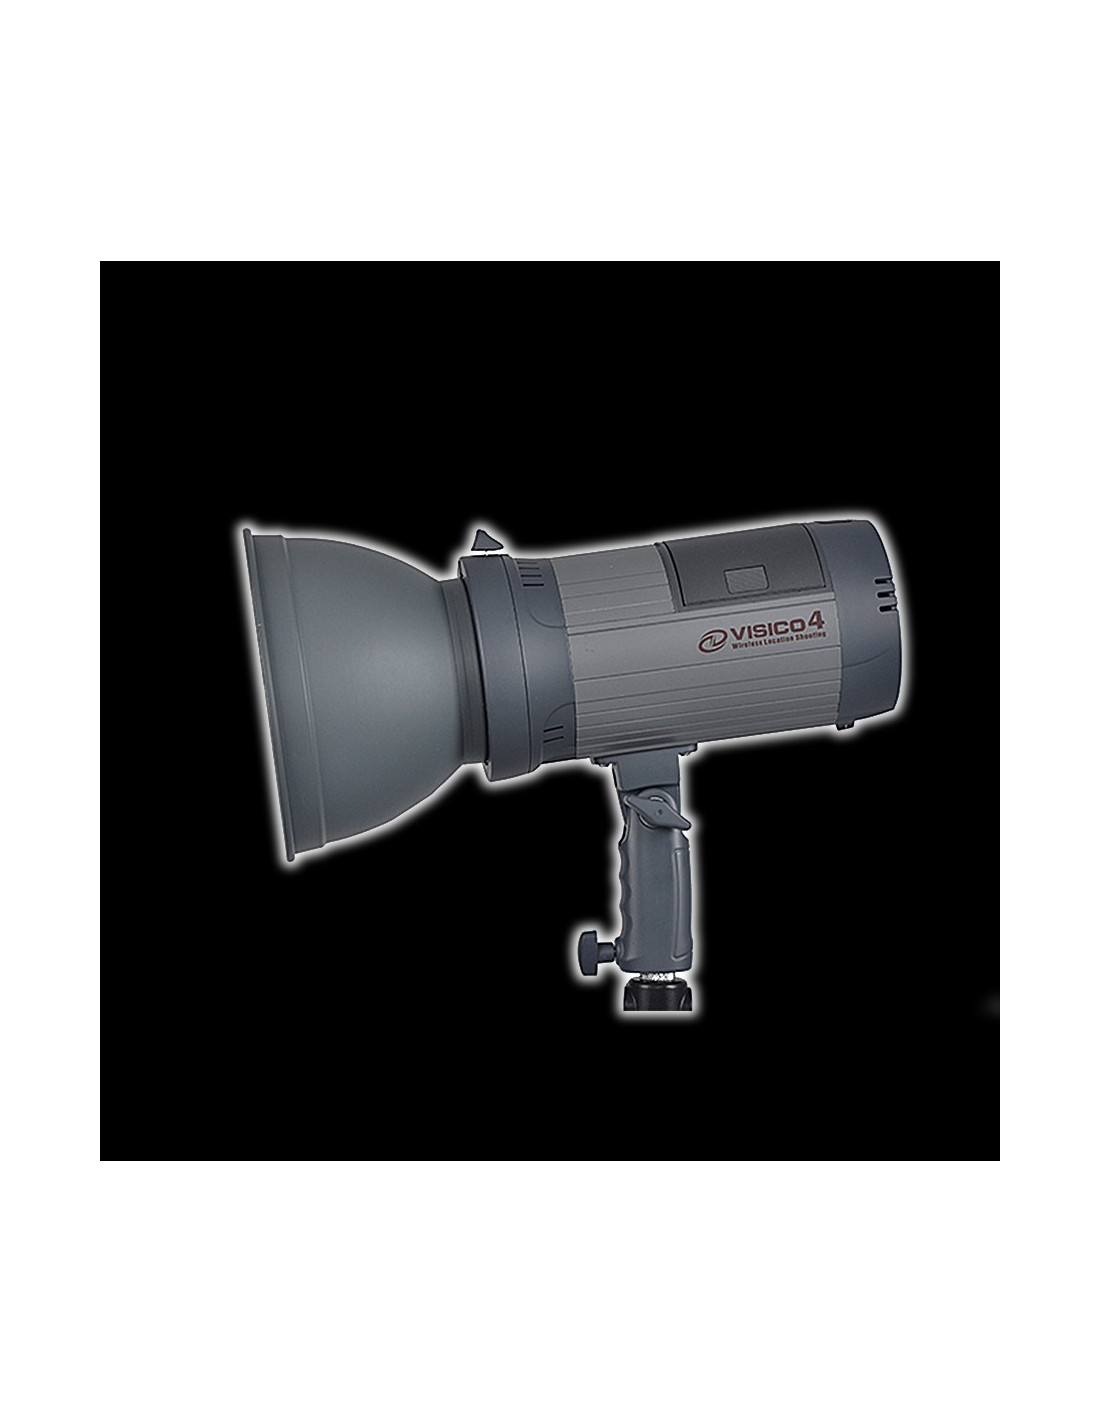
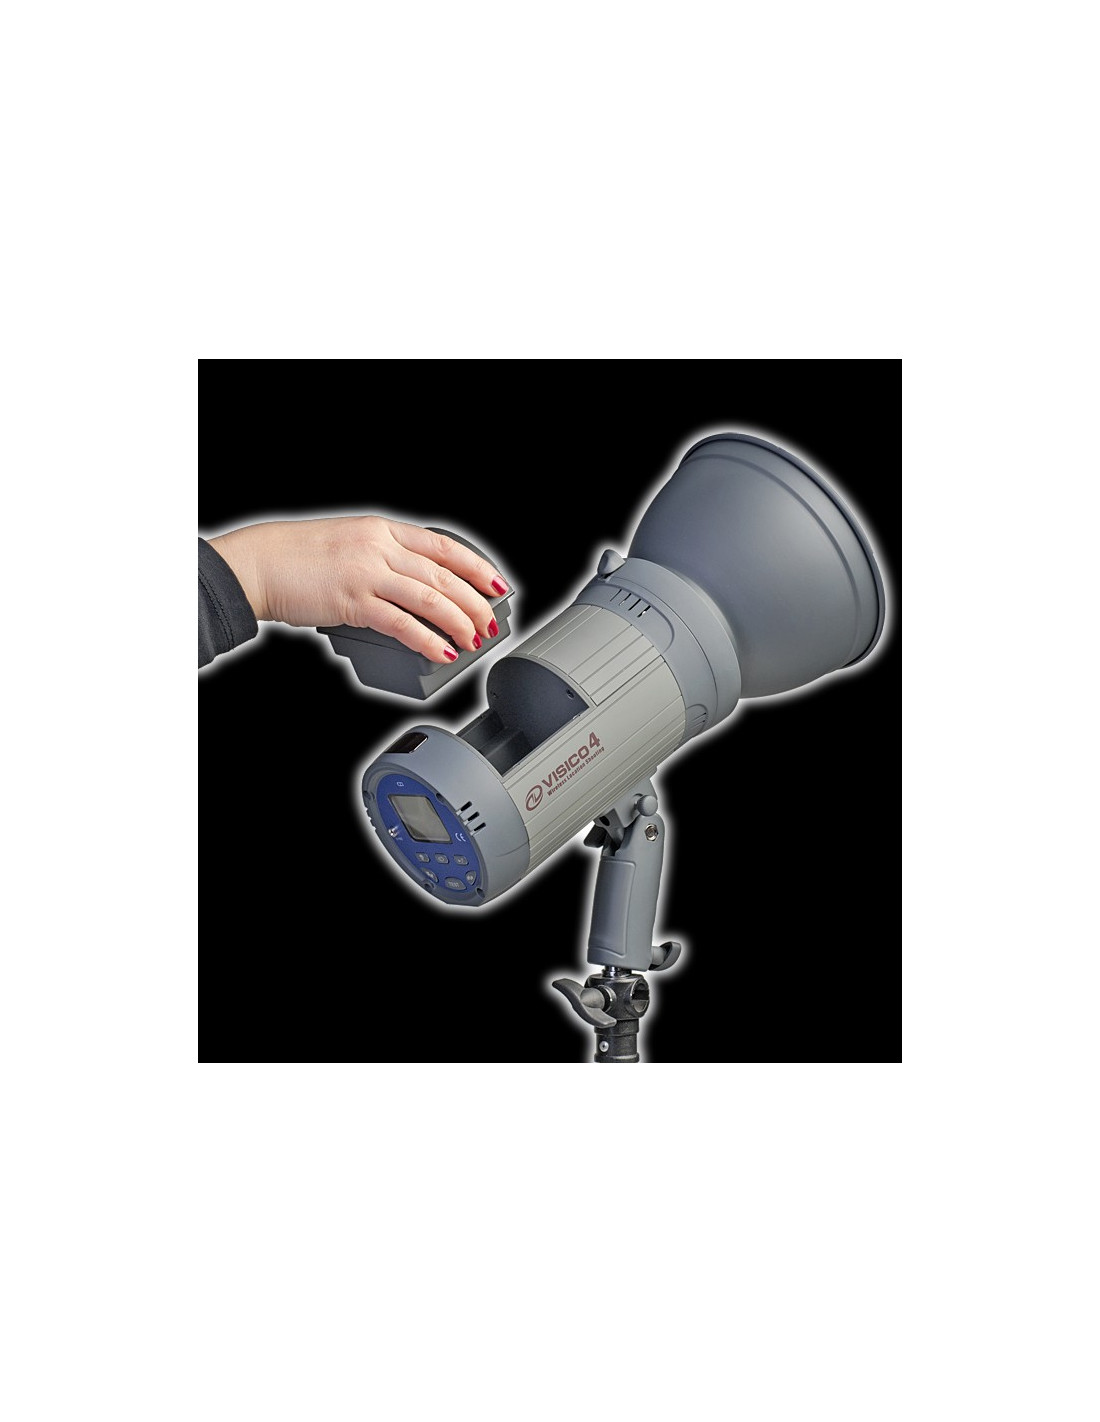
VISICO4 Studio flash
Wireless
Lithium battery powered system
Wide output power adjustment
Fast grab shots
Stroboscopic flashes
LED modeling lamp
2.4G build-in FSK radio receiver


.
Wireless power operation system
.
7 f-stop power variability range from full to 1/16
.
Adjustable Flash frequency reaches 20 times per second
.
Adjustable successive shots reach 15 shots at max.
.
Adjustable short flash duration from 1/1000 to 1/10000sec
.
Adjustable 7 pre flashes
.
13Ws energy saving LED modeling lamp
.
Modeling light selective lighting time 5s, 10s, 15s, and 20s before auto shut off
.
Build in 2.4GH radio receiver with16 channels
.
Legible LCD readout
.
Built-in replaceable Lithium battery
.
AC power (100-240V) charging for worldwide use, and automobile 12V DC charger

Table of Contents

 Description

Introduction
Safety Notes
Package Contents

 Preparing Your Flash for Use
Mounting Flash Light
Release Protective Cap
Installing Reflector
Installing Battery

Charging Battery and Charging indicator
Flash Light Controls
Three Kinds of Menu Modes
Flash Light Output Power
FP High Speed Flashes
Stroboscopic Flashes
Triggering the Flash

 Test Button
Sync Connection
Photocell


 Setting Preflashes
Setting Preflashes Time Frame
Setting Preflashes Block Time

2.4G Build-in Radio Trigger
Group function
Operating the Modeling Lamp
Audible Beep Setting
Recycling Indicator
Low Power Indicator
Auto-dump
Protection Features

Low Power Protection

Overheating Protection
Installing Umbrella
Changing Flash Tube

Discharge the Flash Unit
Remove Old Flash Tube
Install New Flash Tube


How to Care for Flash Capacitor
How to Care for Lithium Battery
Specification

Page


Introduction

Thank you very much for selecting VISICO4 Studio Flash.
VISICO4 wireless studio flash is developed under the concept “free to shot”, integrating with
operation system and power system in one unit, combining leading world high speed and
stroboscopic technology, with 8 conventional breakthrough main features, using carefully selected
components, adopting top of the line product configuration and humanized interface design. The
studio flashes will meet your requirements for shooting in different conditions, and bring your
with years of pleased photography experience.
To make the best use of this product, please read product instruction completely before operation
and keep it handy for your reference.

Safety Notes

•
Do not use the unit in an environment where moisture or flammable vapor is likely to come in
contact with the unit.
•
Do not explore any components in direct sun for a long time.
•
Do not restrict air vents while in use.
•
Do not use a unit with damaged covers, flash tubes, modeling lamps. If the unit is dropped or
damaged in any way always have it checked out before using it.
•
Do not place flammable materials close to either the flash tube or the modeling lamp when the
unit is in use.
•
Do not attempt to disassemble or service the unit on your own to avoid shock hazard. Only flash
tubes and batteries may be replaced on your own.
•
Do not drop foreign objectives inside the housing. There is a risk of electrical shock.
•
Always use a blower brush or clean facial tissue to remove dust and moisture from the modeling
lamp and the flash tube.
•
Always turn off the unit whenever mounting or dismounting accessories.
•
Always turn off the unit and remove battery before maintenance.
•
Always keep out of reach of children.
Package Contents

Your VISICO 5 wireless stroboscopic studio flash should include the following items, please check

carefully.
1x VISICO4 studio flash
1x Lithium battery (included in VISICO5 studio flash)
1x LED modeling lamp (included in VISICO5 studio flash)
1x 100-240V charger for Lithium battery
1x Car charger adapter
1x Standard reflector
1x Protective cover
1x Tripod head adapter
1x 4m Sync Cord


1/ Preparing Your Flash for Use
1-1 Mounting Flash Light

Select a light stand or support system of suitable weight and dimensions to ensure stable operation
of the unit. Rotate knob clockwise to lock flash unit firmly on support system.
VISICO4 studio flash includes a 1/4” Tripod head adapter. It is applied to fix on camera tripods or
other support system with 1/4” screw.


1-2 Release Protective Cap

To remove protective cap, push the latch knob back towards the rear of the unit and rotate the

reflector anti clockwise. Put the protective cap aside.
CAUTION: To avoid deformation of plastic protective cap, always cool down flash unit before
fitting protective cap.

1-3 Installing Reflector

Install the reflector where the protective cap was before. Align the three pegs on the reflector with
the three slots, press the reflector in and rotate clockwise until it locks in place.
Always switch off the unit before fitting and changing reflectors.


Take care not to damage flash tube when fitting or removing reflectors or soft boxes. The flash
tube is very delicate.
CAUTION: Do not touch the lamp with your bare hands. Oil residue from your fingers can cause
the surface of the lamp to heat unevenly and explode. Use white cotton gloves or a clean cloth.


1-4 Installing Battery

According to the battery shape, distinguish battery direction, and then put it into battery
compartment case. Press the battery until hear a clicking sound when the battery is fully installed.

Switch off power before remove battery. Press down lock catch on battery and take it out.


CAUTION:Always switch off the unit and remove battery before replacing flash tubes or repair
the unit.

2/ Charging Battery and Charging indicator

.
AC charge: Insert one end with 5.5mm plug into the charging socket on Lithium battery, and
the other end of the charger into a grounded outlet.VISICO4 studio flash battery charger is
developed for international use within the range of AC100-240V. A fully exhausted battery
reaches full power after 5 hours’ charging. Depending on the battery condition, charging
hours may change.
.12V DC Outlet Charging: Insert one small end of car charger adapter into the charging socket
of the battery. Plug the other end of the charger into to a vehicle’s 12V outlet.
Note: Please remove plug from source supply after the battery is fully charged.


.Charging Indicator: The 100-240V charger has a built-in charge indicator. The LED light is red
while charging, and turns to green when fully charged. The charge will cut off charging
intelligently after the battery is fully charged.


3/ Flash Light Controls


A LCD screen
B Sync jack
C Modeling lamp
D Function button
E Test button
F Photocell
G Beeper
H Adjustment button
I Power switch


J Unbrella hole

Sync jack
Radio trigger signal indicator

4/ Three Kinds of Menu Modes

The studio flash contains the following three different menus:

.
Switch on the unit, you will see the FIRST MENU with power output setting, flash duration
setting, continuous flashes setting, and flash frequency setting.
.
After press the function button( ) for 4 seconds,you will enter into the SECOND MENU
with 2.4G radio trigger’s channel setting, preflash setting, group function, modeling lamp
automatic extinguish delay time setting.

.
After press the function button( ) for 8 seconds, you will enter into the THIRD MENU
with preflash special settings.
Note :The display will automatically quit from the second menu or third menu to the first menu if
no button is pressed after 20 seconds, or press function button ( ) for 3 seconds. And settings
are automatically stored.

5/Flash Light Output Power

The max. power output of the unit is 300Ws. Output power is variable over a 4 f-stops range (5
f-stop points) from full to 1/16. It is represented by full stop increments:1/1,1/2,1/4,1/8,1/16. The
power adjustment lists in the front page of the first menu. Press the adjustment ( )button will
change the power.

…


6/ FP High Speed Flashes

The flash duration range is variable from F1 (1/1000s), F2 (1/2000s), F3 (1/3000s), F4 (1/4000s),
F5 (1/5000s), F6 (1/6000), F7 (1/7000s), F8 (1/8000s), F9 (1/9000s) to FP (1/10000s).
In the first menu, press function button( ),switch to the flash duration page “Fx”. Press
adjustment button( ) to select proper flash duration.
FP high speed flash is used to photographing a subject at nearer distance. It works together with a
fast camera with a high frame rate to capture motion subject.
Flash duration is 1/1000 in F1 mode…Flash duration is 1/10000 in FP mode


7/ Stroboscopic Flashes

.
According to one shutter signal, the unit will generate a series of fast flashes, so that there will
be multiply images integrated in one picture. This function is good at photographing the
trajectory of a moving object.
.
Continuous flash numbers is variable from 3 times, 5 times, 7 times, 10 times, 12 times, and
15 times. In the first menu, press function button( ),switch to “Multi x” page. Press
adjustment button( ) to select proper continuous flash numbers.
.
The flash frequency is variable from 1 flash/second (1Hz),3 flashes/ second (3Hz),5 flashes/
second (5Hz),10 flashes/ second (10Hz),15 flashes/ second (15Hz),20 flashes/ second
(20Hz). In the first menu, press function button( ),you are at the frequency page when
seeing blinking “FREQ”. Press adjustment button( ) to select proper frequency.
.In order to ensure shooting effect,you may calculate the shutter speed that you need according
to flash frequency. For example, when the display shows 10Hz, 15 Multi, then the shutter speed is
1.5s.

8/ Triggering the Flash
8-1 Test button

The simplest way to trigger the flash is to press the TEST button.

8-2 Sync Connection

The sync jack on the flash may be used for direct connection to a sync cord or radio receiver.


8-3 Photocell

. Press the photocell button to turn “ON” or “OFF” photocell.
.
The photocell is active when the “eye” symbol is displayed on screen.
. The unit will be triggered when senses appropriate preflashes from master flashes or other
nearby flash unit. This is a convenient way to wirelessly trigger your flash.
. In order to enhance triggering accuracy and strengthen the ability of anti-jamming, the numbers
of preflashes is able to be adjusted according to your demands in different photography occasions.
It is variable from 0time, 1 time, 2 times, 3 times, 4 times, 5 times, 6 times, and 7 times. In “tx”
mode, total operation time of preflashes is able to be set from 1 to 8 seconds. And in “bx” mode,
the minimum time interval between two adjacent flashes can also be set. Default setting is t2, b5.
8-3-1 Setting Preflashes
In the second menu, the first page is Preflash setting “Cx”. “x” is the number of preflashes plus
main flash from 1 to 7 times. Set the number of preflashes plus mainflash by pressing the
adjustment button( )

Photo Cell "0"
Circle with adjustment button( ) to “C0” automatic recognition mode . Use the camera –on
flash and release a test exposure. The photocell detects the number of flashes the camera released
and memorizes the value automatically. If no flash is detected during C0 mode, then the studio
flash default to 1 preflash.


Photo Cell "1"
If you have selected "C1"in the procedure above, the unit will autoflash immediately when
another flash is activated in the same area.
Photo Cell "2"
If you have selected "2" in "To Set the Photocell" above, the unit will autoflash on the second
flash the photocell detects and will ignore the first preflash.
Photo Cell "3"
If you have selected "3", the unit will autoflash on the third flash detected by the photocell.
Photo Cell "4"
If you have selected "4", the unit will autoflash on the fourth flash detected by the photocell.
Photo Cell "5"
If you have selected "5", the unit will autoflash on the fifth flash detected by the photocell.


Photo Cell "6"
If you have selected "6", the unit will autoflash on the sixth flash detected by the photocell.
Photo Cell "7"
If you have selected "7", the unit will autoflash on the seventh flash detected by the photocell.


…
8-3-2 Setting Preflashes Timeframe

Press function button ( ) for 8 seconds, enter into the third menu. Total time of preflashes
setting “tx” is in the front page of the third menu. “t” is the total time of all released preflashes
plus mainflashes. It is variable from 1 second to 5 second, you can circle through pressing
adjustment button( ). Default setting is “t2” (means 2 second). The flash light will only be
triggered when all the preflashes are fired in your setting timeframe. Set the value “t” between 1-5
to ensure all preflash plus the main flash are inside the time frame.

Value t 1 2 3 4 5

Time(second) 1 2 3 4 5

8-3-3 Setting Preflashes Block Time

In third menu, use the function key( ) to select “bx” page to set block time between two
adjacent preflashes. Preflashes block time is to set the minimum delay between each preflash. Set
value from1 to 9 by pressing adjustment button(


). Default setting is b5.
Value b 1 2 3 4 5 6 7 8 9
Time (milisecond) 2 4 6 8 10 12 14 16 18

8-4 The Photocell is located behind the red transparent cover on the top and at the back of the unit.
The photocell is very sensitive but some experimentation with positioning may be necessary to
ensure a reliable trigger, particularly if the cell is not in the direct line of sight of the triggering
flash unit. Avoid directly illuminating the photocell from a continuous light source (such as ceiling
lights or windows)since this can prevent correct operation. Very high ceilings can also affect the
operation of the photocell.

8-5 2.4G build-in Radio Trigger

.The unit includes build-in 2.4G radio receiver with 16 optional channels. In the second menu,
press function button( ) to “Ch x”page. Press adjustment ( ) button to set a proper
channel.

.
VISICO 2.4G radio transmitter contains 16 independent channels. Studio flash is only
triggered when transmitter and build-in receiver is at the same channel to trigger studio flash.
. In order to avoid mutual interference, please assort different groups of radio receivers and
transmitters with different channels.
. The following pictures shows how to match code between radio transmitter and receiver
correctly.
(figure 1)
8-6 Group Setting

.In second menu, set channel of radio receiver “CH x” the same as radio trigger. The way to
match code between radio transmitter and receiver correctly, please refer to figure 1.

.Press function key( ) to the “Group x” page. There are four group codes (A, B, C, D) for
selection. Press adjustment( ) key to select group. This group is corresponding to the A, B, C, D
groups of radio trigger.

.Press PB1 button to trigger studio flashes.
.Press PB2 to reduce flash output power from 1/1---1/16
.Press PB3 to increase flash output power from 1/16----1/1
.Press PB4 to control modeling lamp ON/OFF
9/ Operating the Modeling Lamp

. The unit contains 13W LED modeling lamp. Press the modeling lamp button to turn the light
‘ON’ and ‘OFF’.
. To save the energy consumption, the modeling lamp isn’t on all the time. It automatically
distinguishes after 5s, 10s, 15s, or 20s time delay. In the second menu, press function key ( ) to
the “d x” page. Press adjustment key( ) to select proper modeling lamp delay time.
Value t 1 2 3 4

Delay time(second) 5 10 15 20


10/ Audible Beep Setting

.
You can turn audible beeper “ON” and “OFF” by pressing the AUDIO button.
.The musical notes symbol will display on screen when the beeper is on, and will disappear
when the beeper is off.
.
When the beep is active, it will sound once the flash is recycled and ready to flash.
11/ Recycling Indicator

When studio flash is on charge, the charging status is indicated by a series of shaded bars. Once
the flash is recycled, the numbers of shaded bars reach at maximum. When the beep is active, it
will sound once the flash is recycled.

12/Low Power Indicator

Lower power indicator will only appear on screen when lithium battery voltage is lower than 8.6V.
It is an indicator reminding end users to charge the battery as soon as possible.


13/ Auto-dump

AUTO-DUMP automatically discharges the capacitors when the power is reduced. Excess energy
is automatically dumped when the flash power setting is reduced. Both increasing and decreasing
the power setting generates heat inside the unit. Therefore avoid repetitive power setting changes.

14/ Protection Features
14-1 Low Power Protection

Before battery power is exhausted, the studio flash will automatically make alarm, warning users
to charge battery as soon as possible. If the users don’t charge in time, the flash light will cut off
output power automatically when the battery is lower than 8.5V. Screen goes out at the same time.

14-2 Overheating protection

Continuous rapid firing of unit for extended periods of time may cause unit overheating, and trip
the heat protection circuit. When the studio flash is overheating, it will automatically make alarm.
When this happens, cool down the unit to a safe level and will start working normally again.

15/ Installing Umbrella

An umbrella with a handle diameter of 8 mm can be firmly secured in the umbrella holder.
Firmly press the umbrella shaft through the holder, the locking knob is located on the side .Do not
over tighten to avoid damaging the shaft of the umbrella.
When the standard reflector is used, fit the umbrella in the hole of the reflector.


16/ Changing Flash Tube

16-1 Discharge the Flash Unit
The charge in the flash unit must be discharged before removing the flash tube. To discharge the
Flash unit:

.
Make sure the Flash unit is ON.
.
Push the red "TEST" button on the rear panel of the Flash.
.
Immediately turn off the power switch on the rear panel of the Flash. Do not allow more than
1/2 second between pressing the "TEST" button and turning the flash off.
.
Remove battery from power source before removing the flash tube. It is recommended to wait
at least 30 minutes before touching/removing the flash tube.
Note: Use white cotton gloves or a clean cloth to prevent fingers from touching the flash tube.

16-2 Remove Old Flash Tube

First, remove the reflector. You will need to remove the retention spring wrapped around the top of
the flash tube. With needle-nose pliers, unhook the retention spring loop. Grip the base of the flash
tube on each side. Carefully pull the flash tube from the flash unit.


16-3 Install New Flash Tube

Make sure the power switch is off and the power cord is disconnected from the source. Locate the
two flash tube pin sockets above the modeling lamp socket. Using white cotton gloves or a clean
cloth, push the pins of the flash tube into the sockets using firm, even pressure at the base of the
flash tube. With needle-nose pliers, hook the retention spring over the hook above the flash tube.
Re-install the reflector.
CAUTION:Always switch off the unit and remove battery before replacing flash tubes or repair
the unit.

17/ How to Care for Flash Capacitor

One of the most important components of an electronic flash is the capacitor. Following the
preventative maintenance below will increase the life and the reliability of your flash.

If the unit is left unused for a few months or predominantly used at low power settings,it is
recommended that the power be increased to maximum and the unit left switched on (modeling
lamp OFF) occasionally for at least 30 minutes to help preserve the life of the capacitors.

18/ How to Care for Lithium Battery

.
Charging times and numbers of flashes may vary according to the condition of the battery.
.
Charge the battery fully before using the unit for the first time.
.
After you finished use the studio flash, or before you store the studio flash, switch off the
unit.
.
If the battery stored for long time, it will become exhausted. Always charge every month.
.
Do not drop the batteries onto hard surfaces, as this could expose the corrosive materials
inside the battery case.
.
Do not attempt to incinerate Lithium batteries or expose them to excessive heat. Batteries can
explode if you toss them into a fire or place them near other extreme heat sources.
19/ Specifications of Flash Lights

Technical Dates
Item number VISICO4
Power output 300Ws
Guide number GN(2m,Iso 100)1/60
Reflector SF-610
60
Output power rang Full power to 1/16
Recycling time at Max.output power 2.5s
Recycling time at Min.output power 0.4s

13


Flash duration Full power 1/1 1/250s
Flash duration Min. power 1/16 1/4000s
Successive flashes 3shots;5shots;7shots;10shots;12shots;15shots
Flash frequency 1Hz;3Hz;5Hz;10Hz;15Hz;20Hz
Stroboscopic Mode Flash duration
F1 1/1000s;F2 1/2000s;F3 1/3000s;F4 1/4000s;F5 1/5000s;F6 1/6000s;
F7 1/7000s;F8 1/8000s;F9 1/9000s;FP 1/10000s;
Modeling lamp LED 13W, 1370lumen (energy saving)
Color temperature 5500K±200K
Trigger voltage 5V Low voltage trigger
Triggering frequency with inner 2.4GHz remote control, 100m effecitve distance in open air
Trigger methods Sync cord;Photo cell;remote control;Test button
Flash tube "Plug-in" tube (user replaceable)
Flash light dimension diameter 125mm x length 220mm
Flash light weight 1.8kg
Number of flashes at full power per charge 700 shots
Power source Lithium battery
Battery capacity 6000mAH, 12V
Charging way Battery plug-in charging type
Charging voltage AC 100-240V, DC12V
Charging time 5hrs
Flash light protection Overheating protection; Low voltage automatic power cut-off system
Accessories
F3.5mm sync cord, standard reflector, protective cap, 100-240V charger,
12V automobile charger, Tripod head adapter

Charging time and number of flashes may vary according to the condition of the battery

14
Flash frequency reaches 20 times per second: it means the interval time between two adjacent shots can reach 1/20 seconds. The point is the time speed between two adjacent shots.
Succesive shots reach 15 shots at max: it means the studio flash can shot 15 times at max per trigger. The point is the shot number per trigger.
The flash frequency depends on photographers demand when they shooting pictures.Flash requence 20 shots per second special used for shoot the object's trajectory.
5 f-stops between full and 1/16: as the VISICO 4 used is IGBT technology,if divide more f-stop,the color temperature deviation between each f-stops will be bigger,so finally we decide 5 f-stops 1/16
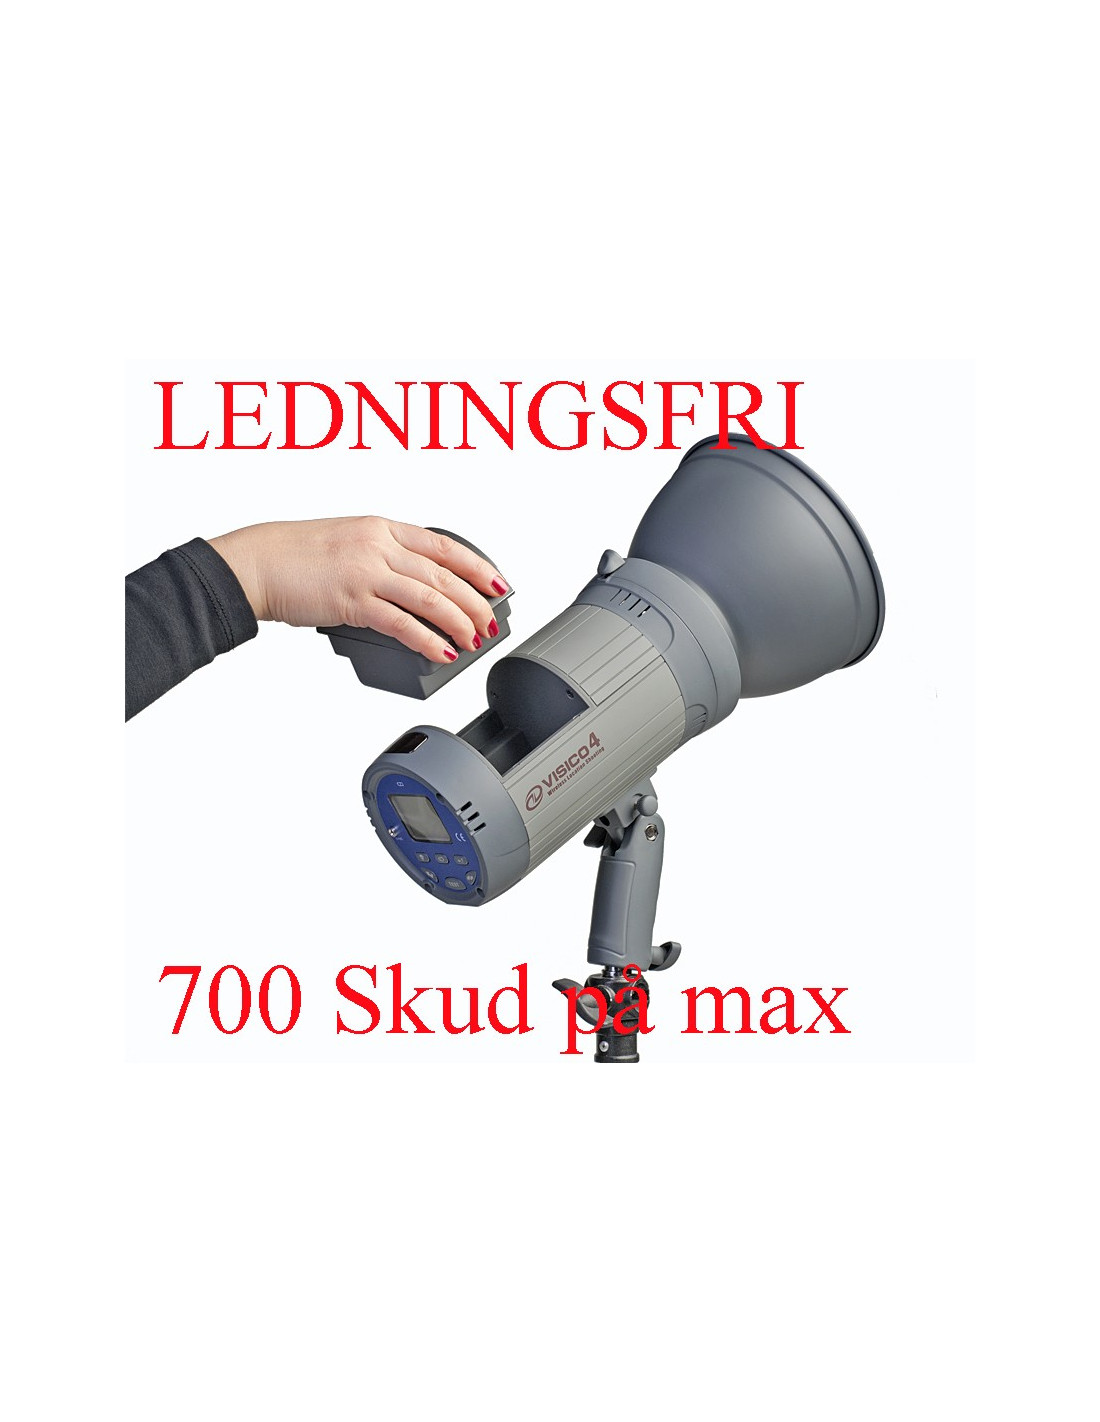
Our testing for VISICO 4,the battery full charged can shots 700
No reviews
Tap to zoom
